Home Workout ® App - Meal Tracker
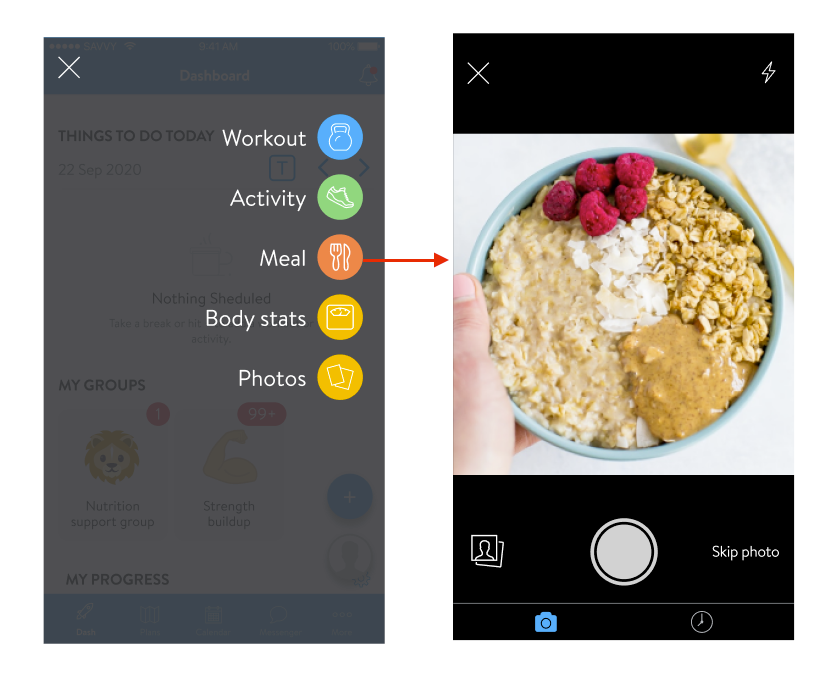
In this article we will explain how to record your meals using the Meal Tracker feature of the Treino em Casa ® App.
The coach cannot do this registration, so it is a task exclusively carried out by you.
Searching for a Food & Barcode Scanning
3. Next clients can add in all of the foods that make up their meal. This can be done by searching for the food in the search bar. Clients may notice a blue checkmark next to some foods. These are USDA-verified foods. This means that the nutritional information of this food has been verified by the USDA.
Can't find a specific food item? Customers can report missing food items or incorrect food information directly from the meal tracker's search page! Just select the option highlighted below, fill out the form that appears, and the request will be sent straight to our team for review!
Additionally, clients can also easily add the item by scanning the barcode (available for the US, Canada, Australia, and the UK).
Any recently selected foods will be stored in the RECENT tab. And by tapping on the name of the food, customers will be able to view all of the details of the food. This includes the serving information, calories, macros, and micronutrients.
Adding Custom Foods
If a food does not exist when a client searches for the food, they can go to the CUSTOM tab and add a custom food manually.
They will be able to input the name of the food, serving size, and calories (all required), including optional info like macros and micronutrient details.
Adding the Meal
4. After adding in the foods, clients will see an overview of what's been added to the meal. They can adjust the serving size, add in more foods, add a description, and update the photo if they wish then hit SAVE to save the meal. And ta-da! A new meal has been tracked! 🙌
The meal will also be automatically tagged as Breakfast, Lunch, Dinner, or Snack depending on the client's phone's time (based on the moment they hit save).
- MEAL TIMEFRAMES
- breakfast - 06:00am-10:00am (4 hours)
- snack 1 - 10:00am-11:30am (1.5 hours)
- lunch - 11:30am- 3:00pm (3.5 hours)
- snack 2 - 3:00pm-6:00pm (3 hours)
- dinner - 18:00pm-21:00pm (3 hours) after dinner snacks until breakfast
Adding a Past Meal
We've made it easy for clients to track a past meal by allowing them to select the meal from their meal history.
- Click the lower right-hand clock icon to bring up any previously tracked meals.
- Select the meal and click Add
.
There can only be one meal per Breakfast, Lunch, Dinner. If the meal already exists, the client will be prompted to replace it with the new meal or keep the new meal as a snack.
How to add a meal to multiple days (for clients)
To add a meal to multiple days, follow these steps.
1. In your mobile app, click on the " + " icon at the bottom-right of the screen.
2. Click on the " Date " option at the top.
3. Select the desired dates in the present or past that you wish to add the meal to.
4. Once done, select " Meal ".
5. Enter the details of what's in the meal and then click " Review ". Once the details of the meal have been entered, click on " Log " at the top-right. Your meal has been saved to multiple dates successfully!
.
Home Workout ® App
Do you want to achieve your fitness goals effectively and without complications? Home Workout ® App is the perfect solution to transform your daily training into a simple and personalized experience. Check out some of the advantages:


